Tuesday, January 31, 2012

Valentine's Day Pillows

I finally got around to making our Valentine's Day Pillows. I didn't want something super traditional and cutesy. And they don't coordinate very well with our couch. Oh well! Here's my pillow cover tutorial. But what you'll need for one pillow is a yard of fabric (a yard and a half if it has a pattern that has to go a certain way) and a pillow form (of course a sewing machine and some thread). That's for an 18 x 18 pillow form. Of course, you'll need more or less if you're using a different size pillow form.


Sunday, January 29, 2012

Project 52- Week 4

So here's my photo for week 4. We had a lot of rain this week. It was kinda scary, since we were never sure if we'd make it home on Wednesday. This is Trinity Blvd. 

Art Storage for the Kid

I've been trying to figure out a good storage system for storing Sophia's artwork.

 I would love to make a super cute book by scanning each piece but we don't have a scanner. So until then......meet my temporary system. 

Two pieces of 18x24 pieces of mat board (or poster board), add some cute duct tape on 3 edges. Temporary housing until we get a scanner (I plan on scanning her art and turning it into a book). I'm dividing mine by years so far....


Friday, January 27, 2012

Love Bunting


This post was from last year and it's what is hanging on top of my love birds painting.

So I got my inspiration for my project today from my friend Kristy over at The No No Room. Here's her idea for a Valentine's Day banner. I love all the layering that she did.

So my first supply to get was some coasters, just like Kristy started with. I ended up with round ones because that's what they had at Red Robin's where we ate on Sunday with my parents.

I inked all the edges.

Next, I decided the base paper for each coaster.

I added embellishments and strung it up on twine.

Here's an up close shot of the heart. I just inked it and accordion folded it. 


The white hearts you see are actually buttons and I just cut the plastic loop off of the back. I still like Kristy's version way better but I'm happy with how it turned out.

I had an extra coaster so I made a magnet out of it that I plan on giving my parent's for Valentine's Day. I just need to find a picture of Sophia to add to it. I just hot glued a magnet on the back.


I found these cute hearts in the button section.

Thursday, January 26, 2012

A Valentine Wreath

Finally got around to finishing my Valentine wreath. It's not exactly a wreath, but you know what I mean. 

I got the frame at Hobby Lobby in the frame section for 50% off, meant for canvases so it has no glass.
I hot glued a ribbon from top to bottom on the back side. And then attached a heart using the paper method in my garland tutorial

I added some ribbon at the top that I staple gunned to the back so it can hang from a wreath hanger.

Super easy and pretty cheap for me (the frame was $15, the ribbon and paper I already had).
TheRusticPig
tessacotton

Visit thecsiproject.com

Valentine Mantel

So here's my Valentine mantel, all put together. I just reused the same candles from my Christmas mantle. I dug out a few wood carved pieces I'd bought from Hobby Lobby that I loved but didn't quite no where to put them. 

I also reused my apothecary jar from Christmas, but filled it with hearts instead. The hearts I got at Hobby Lobby. They were meant to be hung on a Valentine Tree but I just cut the strings off of them.

I had to make my own holiday tags for my blocks because I haven't had time to make it to The Little Blue House to take a class. But the ones I made will do for now.

The silver candle holders were Goodwill finds that I spray painted.
I made the painting of the love birds and bought a frame at Hobby Lobby. 
Think I should buy stock in Hobby Lobby?

Here's Sophia's contribution to the mantle.


Wednesday, January 25, 2012

Love Bird Painting

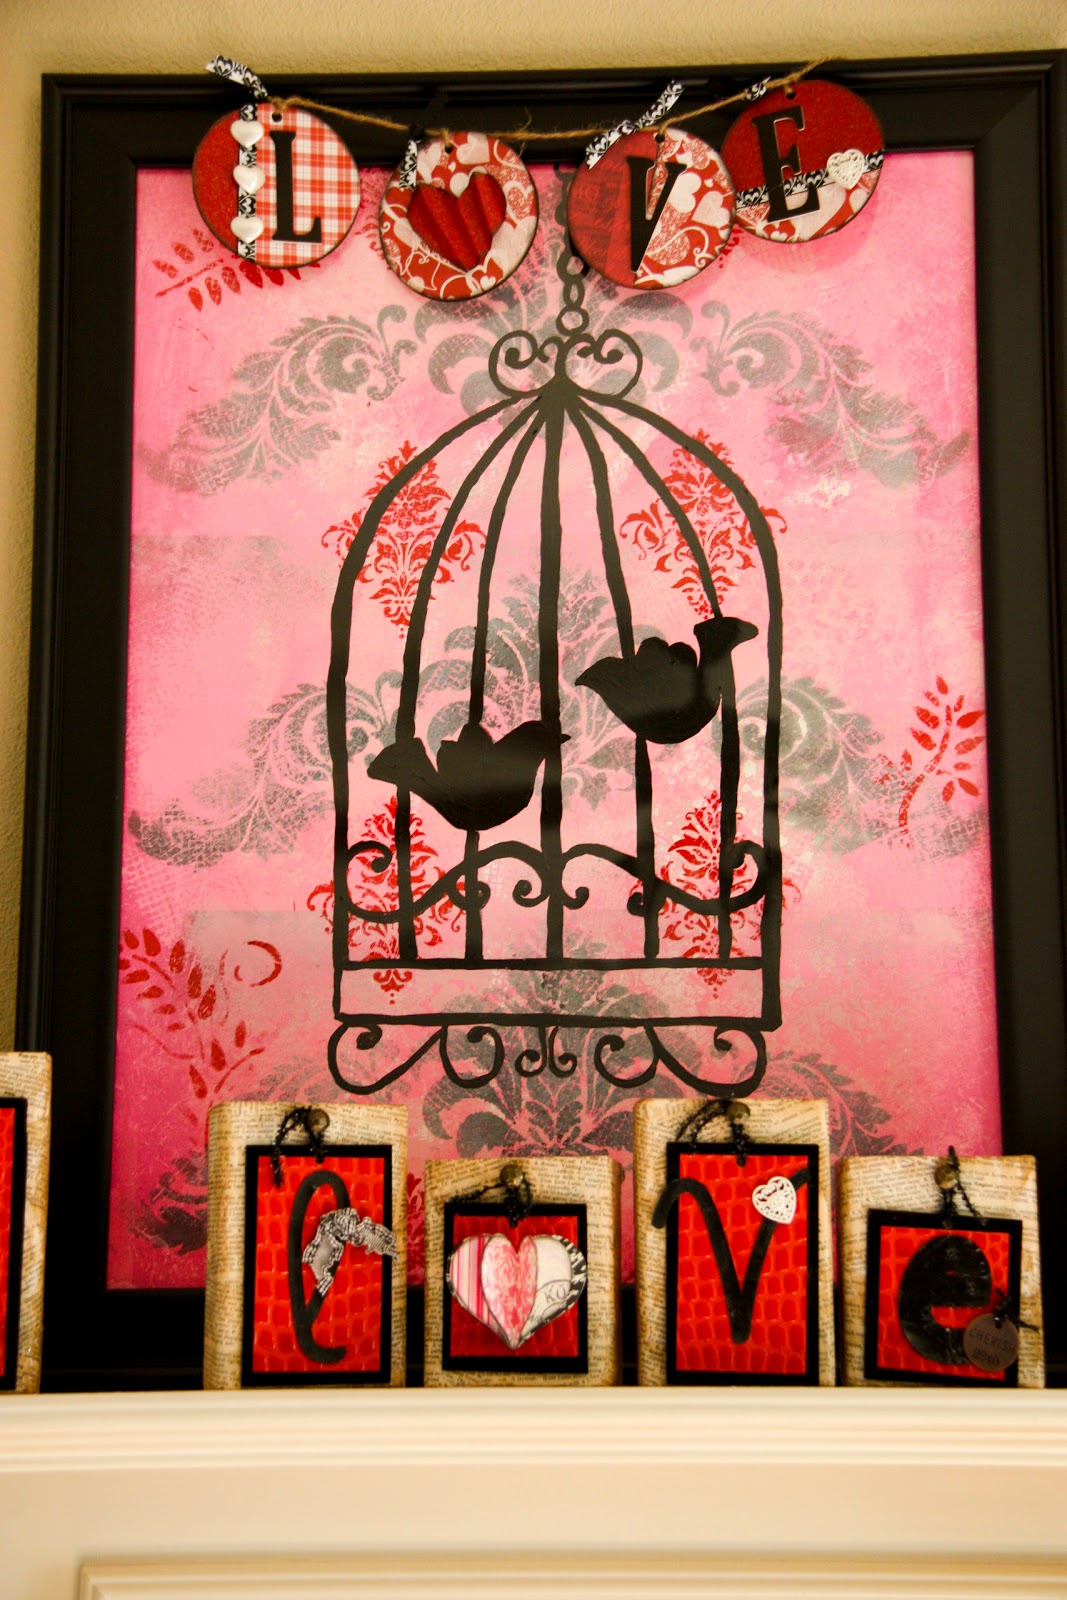
Here's the Love Bird Painting I recently made for our Valentine mantel.

Let me show you how I did it.
First of all, I had a scrap of 18 x 24 mat board handy (you could use canvas, watercolor paper, poster board, any size will work but since it's for the mantel, I went bigger). Then I applied a layer of gesso. I let it dry.

Then I painted on a little light pink. Then I printed objects like packing bubbles. Just use a paintbrush to brush the paint on the packing bubbles.And press on to the paper like a stamp.

I bought all these fancy tools but the best ones were the packing bubbles and the triangular sponges that people apply makeup with. I also tried doilies (fabric ones, I bet the paper kind would have been better). I found the thinner the stencil the better the print. And never fear....I got all of my acrylics from my stash or they were 99 cents at Joanns.


Then around the edge I applied a darker pink color. Let it dry for about a minute and spritzed it water.


The  I used a paper towel to blend the 2 paint colors together (creates texture).

After that dried, I stenciled some figures on there (see my post on my One Little World Journal/Scrapbook for more tips on textures).


Then I found a clip art example of a bird cage with some love birds. I used a thin sheet of sketchpad paper (newsprint, without the print), to draw half of it.

Then I traced half of the birdhouse on the painting. Then flipped it over and traced the other side so it was symmetrical.


Just love the textures of this painting.

Then I added the birds and painted it using black paint.

Then I added a plain black frame and glass (as seen at the top of this post).

Visit thecsiproject.com