Showing posts with label Painting Activity. Show all posts

Saturday, January 21, 2017

Family Initial

Unfortunately, we are one of those families whose last name starts with K.
I'm always envious when I see a family letter wall.
Group too many K's together. Bad! Really bad. So I decided to make this freestanding K to present our family.
My challenges...the letter K obviously. Materials....what I had on hand. This was part of my Christmas crafting challenge where I tried to use materials I'd had forever. This is what I came up with.


I started with a wooden letter K.

Pages of sticky backed aluminum  pages. And red and turquoise paint. And Embossing powder, distressing ink, heat gun and Sizzix boutique press. I had a ton of crap on hand!!!!!

Here are the metal pieces.

I put a piece of metal (I cut it with my paper cutter) to fit in my Sizzix folder.

I ran it through my Boutique machine.


I painted them with leftover Turquoise paint (acrylic). Lightly.

Once dry, I distressed them with an ink pad. I think it's a Ranger product. You just rub it across the top. While still wet.....
Sprinkle on the Embossing powder. Let the excess run off. 


It gets this crystalized affect.  


I had to cut and piece my metal to fit my letter K.

Monday, January 16, 2017

Picture Frames


I've had these wooden frames for a while now and didn't really know how I was going to use them.

So I searched in Pinterest.
Here was my inspiration that I found on Pinterest.
I opted to paint mine red because it was the only color I had enough of on hand to cover all the 3 frames.


I had these metal clips in my stash of supplies. I think I got them at Hobby Lobby.

After the paint was dry, I added a piece of scrapbook paper.

Here is a little trick I used to hang them. Get some tooth paste.

I did a drop on top and bottom of where the nail would go.

I held it against the wall.

Then added the nail.


The cool thing is, I can trade out the papers inside the frames.
So for Christmas, I'm going to use the papers below.


Don't forget to use the coupon codes
20PERCENTDISCOUNT for 20% off
and FREESHIP2017 for free shipping in my Etsy Shop.

Monday, December 19, 2016

Christmas Card Holder

Meet my new Christmas card holder!

I bought this slat board over at The Wood Connection about 5 or 6 years ago. I never really knew what I wanted to do with it, so I put it in my craft closet and forgot about it.

 So yesterday, I decided to finally do something with it.

After I searched Pinterest for pallet board ideas, I came across this one from
Once Upon a Vinyl by Liv....a Christmas card holder. My old Christmas card holder broke, so I needed a new one!
I love the title Merry Mail and the rustic feel of it.
So I got my fuel ready...Diet Dr. Pepper from Sonic.

I was determined to use what I had on hand, #1 because I didn't want to get out in the sub Arctic temperatures, #2 my daughter is sick and I didn't want to be away from her for too long (me in a craft store can take a while, and #3, it's more of a challenge.

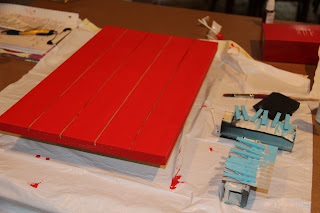
I had red acrylic paint, turquoise acrylic paint (only a little), mini-clothes pins and twine. So I started by giving both the board and pins 2 coats of paint.


I could have hand lettered the words Merry Mail or used vinyl letters but I wanted this to be quick (I have more crafts to do after all),so I'm going to show you a little trick I use in my art room to transfer your practice to the real paper. It's called chalk or graphite transfer. Any type of chalk or graphite will work. I wouldn't use anything waxy.
First, I printed Merry Mail on my inkjet printer in one of my favorite fonts, Pea Ellie Bellie (a free one).

Next, I found some chalk on our menu board in the kitchen and colored on the backside of the words.


I taped the paper in place and used a pencil to outline each letter.

Take off the paper and left behind is a chalk outline of each letter.


I used a white gel pen to outline each letter. Then I used the same pen to add some hatching inside each letter.

Let the ink dry. No really...let it dry overnight. Once dry, use a damp cloth to get rid of any extra chalk.


 Then I took the twine and used my staple gun to tack it in place on the back.


Add the clothespins.

Then add the Christmas cards.

It doesn't hold very many, but I'm going to trade the cards out as we get more.
Thanks for the inspiration, Once Upon a Vinyl by Liv